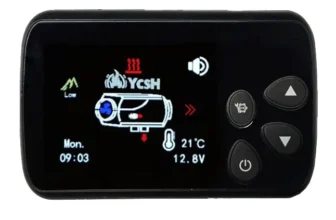
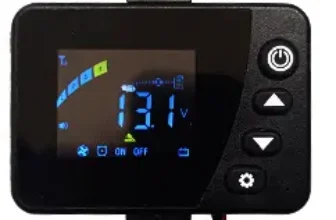
LCD Negro (rectangular buttons)
Before the first start, the heating must be vented. ( purged mode )
Once the heating is installed, the circuit must be purged., I have seen everything, from sucking to filling the circuit with a syringe, although they are methods that work, There is a much better way to purge the heating and it is the one offered by the heating.
We will purge it until the filter is full and we do not observe bubbles in the tube., The ideal would be to remove the heating tube and throw the excess into a bottle until the circuit is completely purged..
This operating mode remains active for 2/3 minutes, starts soft and increases speed. Depending on the distance of the tube, the process will have to be repeated several times..
First boot
So as not to be disappointed, and we find that our heating does not start, we must do a series of checks VERY IMPORTANT.
- The battery icon flashes or E appears-01? It is not due to lack of battery, but it is configured at 24v.
It is necessary to verify that the electrical connection, the cable section and the battery are in good condition, Every day I find people telling me that it won't start and that the heating is a problem. SHIT.
He 99% most of the time it turns out to be due to poor installation, use cables of inadequate section less than 4mm, or the battery is dead, or below 30% charging.

State of a battery according to its voltage
Once we press the power button on NO CASE the battery voltage should drop below 11.5v. If you do this, the heater will probably release white smoke and will not be able to start.. Giving us multiple errors, either E engine-06, E-08 or the most typical the E-10.
It is very common to think, I start the engine and that's it, but it's not that simple, Yes, it might start but end up giving an error and shutting down after a few hours.. As I have already mentioned, The battery voltage should never drop below 11.5v or problems will start., Keep in mind that at that voltage the battery is approximately 10% of your load, you will have to charge it or replace it.
Screen information
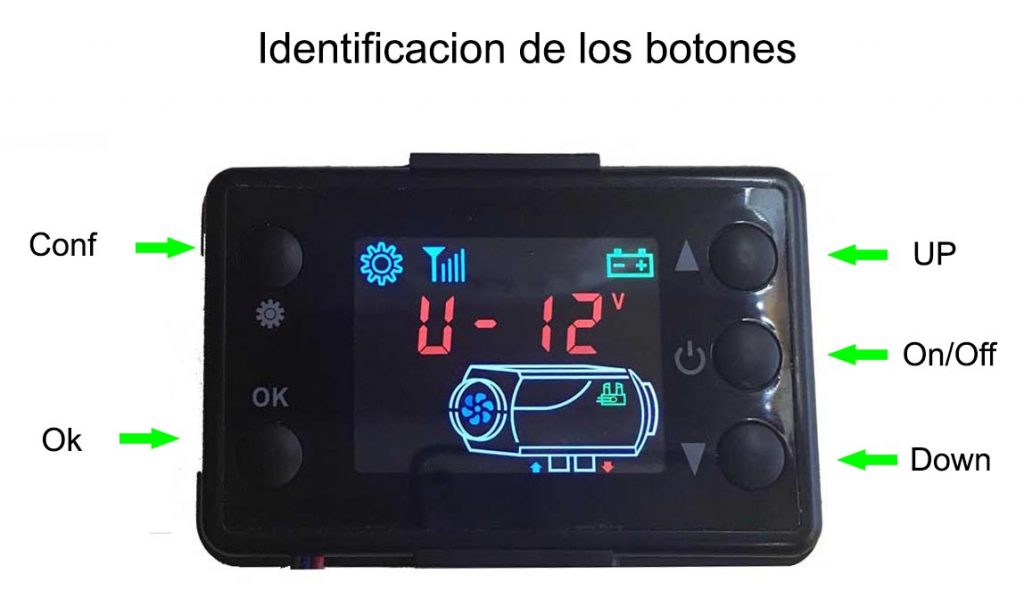
With the tecla OK (bottom right) We change the information shown on the screen:
- Room temperature
- Temperature or HZ set on the thermostat or power mode
- battery voltage
- Last error code (if it shows 0, it means there are none, It will reset on every boot attempt.).
- Rajas (mode to enter the configuration)
(The photo is as an example, corresponds to the CH4 model) which the slightly different from this manual.
How to associate or pair the remote control

We press on the screen Up arrow until the screen shows HFA.
Once we have HFA on the screen, we must press the button On from the remote control.
It will immediately appear ON on the screen and the heating will turn on. If ON does not appear, we will repeat the process with the OFF button, If it doesn't turn on, unfortunately the Chinese on duty will have sent you a normal remote control without the codes programmed for it to work., It is best to contact him, and claim the amount of the remote control to buy another.
How to program the time on the heating LCD screen
This screen model doesn't even have an hour, no ignition programming
How to enter the heating settings (advanced settings)
With the advanced settings we can adjust the air mixture / diesel easily at our whim, always within limits so that it works correctly and efficiently.
To access the LCD screen settings we have to reach the lock icon using the settings button. They will come out 4 stripes where you have to enter a password, this is 1688 / 9009, which must be entered digit by digit and confirming with the button OK.
These are the heating serial data, which we are going to explain (with serial values).
- 1.6 hz
- 4.5 hz
- 1680 rpm
- 4500 rpm
- 12V
- SN-1
By order:
1.6hz : With it we adjust the minimum amount of diesel once the thermostat reaches the temperature that we indicate..
4.5hz : With it we adjust the maximum amount of diesel that the heating will use at maximum power.
1680 rpm : Minimum fan speed once it reaches the temperature that we indicate
4500 rpm : Maximum fan speed
12V / 24V: Operating voltage sometimes arrives incorrectly configured and causes error E-01.
SN-1 : Speed sensor configuration, A poor adjustment will cause the fan to go at double its normal speed.
Off: Used to change the password, We will turn ON and it will ask us for the new password
IMPORTANT, I have received quite a few queries about the E error-01, it is voltage error, but not due to low voltage, but for coming poorly configured. Being the 12v model, they are configured at 24v, the battery icon flashing on the screen and giving an error.. It's as simple as changing the value in the settings.
Chinese static heating operating modes
This type of screen has 2 modes of operation which I am going to explain to you how it works.
HZ power operation
In this operating mode, a red LED will light on the screen. In factory power mode, it will output 1.6hz., This number is the minimum heating (unless you modify it in advanced configuration), Being able to increase it up to 4.5hz, which will be when the most heat will come out..
With this mode of operation, the heat output will be stable over time and will not vary at any time..
Thermostat operation
A blue LED will appear on the screen., The value in degrees ranges from 8º to 35º maximum. Internally what this mode of operation does is vary the HZ of the previous mode between 1.6 y 4.5 to adjust and maintain the temperature that we indicate on the screen.
IN ANY MOMENT the heating is going to turn off, It is a mistake to think that the heating is malfunctioning or the thermostat is broken., Its operation is like this, and we will not be able to insert another thermostat to turn it on and off at will as we could do in older models. 8/9 years of eberspacher or webasto.