


LCD ch14 Version 2019 (no universal)
How to purge the heating
Once the heating is installed, the circuit must be purged., I have seen everything, from sucking to filling the circuit with a syringe, although they are methods that work, There is a much better way to purge the heating and it is the one offered by the heating.
We will purge it until the filter is full and we do not observe bubbles in the tube., The ideal would be to remove the heating tube and throw the excess into a bottle until the circuit is completely purged.. If bubbles remain, the only thing it will cause is that the heating will not work well., and smoke.
This operating mode remains active for 2/3 minutes, starts soft and increases speed. Depending on the distance of the tube, the process will have to be repeated several times..
First boot
So as not to be disappointed, and we find that our heating does not start, we must do a series of checks VERY IMPORTANT.
- The battery icon flashes or E appears-06 the E-02? It is not due to lack of battery, but it is configured at 24v.
It is necessary to verify that the electrical connection, the cable section and the battery are in good condition (It is highly recommended to replace the original cable with a 6mm one.), Every day I find people telling me that it won't start and that the heating is a problem. SHIT.
He 99% most of the time it turns out to be due to poor installation, use cables of inadequate section less than 4/6mm, or the battery is dead, or below 30% charging.

State of a battery according to its voltage
If the battery voltage drops below 11.5v, the heater will release white smoke and will not be able to start.. Giving us multiple errors, either E engine-06, E-08 or the most typical the E-10.
It is very common to think, I start the engine and that's it, but it's not that simple, Yes, it might start but end up giving an error and shutting down after a few hours.. As I have already mentioned, The battery voltage should never drop below 11.5v or problems will start., Keep in mind that at that voltage the battery is approximately 10% of your load, you will have to charge it or replace it.
Activate height mode
It's very simple, you just have to press: Settings button + OK (a mountain icon lights up on the screen).
To deactivate it we will repeat the process.
We can also use this mode to “lower him” a little power to the heating, in the event that we have a very small vehicle and we are hot.
You must remember to always activate it above about 1500m.
How to associate or pair the remote control
With the heating turned off, we press the button light + Arrow down.
It will appear on the screen OC 1. (we can vary between 1 y 5). Being at the desired number, press the power button on the remote control and it will be paired..
The manual does not make it very clear, and I don't have the screen to program it, but it is possible that they can be paired up to 5 different controls.
We press ok or another button to exit the menu.
How to program the ignition
It is very simple, you have to press the key OK+ down arrow.
We will see a clock on the screen with a ON beside, which tells us to enter how many hours and minutes we want to turn on, for example 4h and 30 minutes.
- With the power key we change the digit and with the arrows we choose the number that interests us.
- With the configuration key we change between ON and OFF
- With the OK key we save the configuration
- Holding the configuration key 2 seconds, we exit the programming menu
Once we have the hours configured, con “Setting + up arrow” We activate or deactivate the timer.
How to see how much time is left until it turns on or off
We press the key “setting” just one time, and the counter appears.
Operating modes
This type of screen has 2 operating modes Manual o Automatic.
Manual power operation
Heating offers us 6 powers, of H1. to H6 with H1 being the lowest.
To adjust the desired power we will use the up or down arrows.
Automatic Operation
In this mode it allows us to adjust the temperature by degrees, depending on the ambient temperature and the desired temperature, Internally the heating will vary between H1 and H6.
IN ANY MOMENT the heating will turn off, It is a mistake to think that the heating is malfunctioning or the thermostat is broken., It works like this.
IMPORTANT
Some users report that after a few days operating at 800/1000m they have carbon problems, so I advise using it ALWAYS with height mode activated to avoid it. And not only when passing 2000m.
You can check the error codes for this model HERE


Esteban the manual for ch14 is not there.
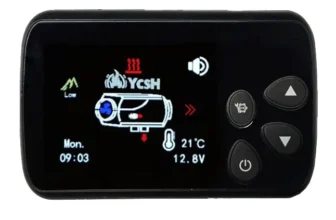
Hola! I just bought a stationary heater. And this is the Display ( not the typical YouTube) What does it bring me? I can't configure it and I haven't received any instructions with it.. I would greatly appreciate help on this topic since I am a newbie..
What I get is a notice at the bottom left of a red circle with a stripe in the middle.
Hello Andrea, that red circle “forbidden” It's just telling you that it's off.. I'm working on the manual, It is complex without physically having the screen. (it arrived broken). Greetings.
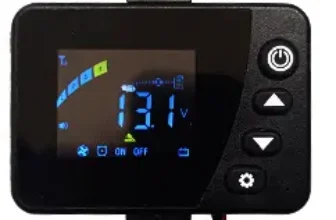
Hello, good morning, I just installed this heating with a square knob. 2019 I have managed to do everything except program the time to turn on and off when I press menu plus up key the clock appears but it does not appear to set the time. Thank you
Hello Alberto, please ask in the group facebook, I don't have the screen to check it. Gracias.
Hola, Do you know if there is someone who installs these heaters?, in Madrid or surroundings??
Thanks greetings
Hola, I wouldn't know how to tell you the truth, but if you ask in the group facebook I'm sure someone can tell you a place where they set them up..
Greetings.
In step 2 you talk about getting an E-06 or E-02 error if the system is set to 24 Volts instead of 12 Volts. I know you discuss propper wiring and sizes but is there a way to actually change the heater’s setting to 12 Volts so it can run off of my 12 Volt system?
But your unit is 12v set to 24 on the screen? or is it 24 and you would like to use it at 12v? if the latter is the case, you must change the brightness bulb, the engine, and fuel pump.