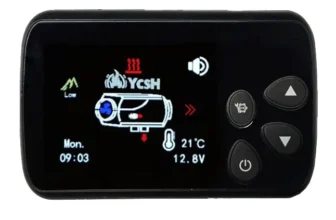
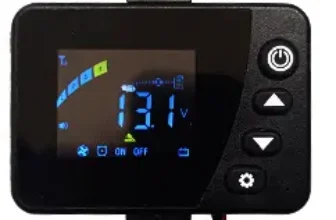
This new screen may cause confusion, thinking that it doesn't work or the screen is damaged, As soon as you connect it, it doesn't let you raise/lower either the power or the degrees., solo will let it do it once the heating is on lit.
Height mode
It's very important, if you don't want me to end up failing you, ALWAYS use it with height mode activated.
To activate it you just have to press Left arrow + Right Arrow at once, a will light up blue icon with a mountain in the lower left.
How to turn the heating on or off
For light: We leave the power button pressed for 3 seconds. will light up.
For to switch off: We leave pressed 3 seconds and OFF will appear on the screen. The process takes a few 10/15 minutes until it cools completely and the fan stops working.
Temperature regulation
Left arrow to increase. Right arrow to decrease. Unlike other screens, By pressing it we will not see the changes if we are not exactly in the temperature or power menu, which we will access by pressing repeatedly until we see H* or A* on the screen.
Operating modes
To switch between one mode or another: Credit left arrow + power button.
By power
It will show H3 on the screen by default, which we can vary between H1 – H6 being H6 the highest power and H1 the lowest.
By temperature / thermostat
It will show an A on the screen followed by a number that will be the temperature at which we want the thermostat to jump., we can vary between 8 degrees and 35.
Clarify that the heating never goes off, but it will automatically adjust internally between H1 and H6 until it reaches the temperature we select..
This screen when having only 3 buttons, the central power button acts as the confirmation button (ok on other screens)
Menu options: (with the heating on)
- Room temperature
- Combustion chamber temperature
- Voltage (without decimals)
- Hour
- Selected power or temperature
purged mode
You have to press the button switched on + right arrow, H OFF appears, With the arrows we change it to ON and it will begin to purge, yes if it goes up on the menu, We repeat it again so we can change it to OFF and make it stop..
It only works after connecting it to the power, after a certain time, is disabled, so if it doesn't work, unplug it from the power and plug it back in..
How to synchronize the remote control
Press and hold the right arrow for a few seconds until the display shows HFA1, we have the option to configure up to 5 different controls, We simply put ourselves in the desired position and press ON on the remote control.. Make sure it has batteries… they don't usually bring it, the stack model is: GP27
Set power on / off
This screen model only has 1 timer, if the heating is on OFF what it will do is turn on. If, on the other hand, the heating is ON what it will do is turn off.
It is very easy to activate, just press and hold the arrow LEFT We will be able to put the HOURS in the following format 99:59 therefore a maximum of 99 hours, y 59 seconds.
On some screens if we turn on 1 time would be like this: 01:00 but they don't turn on, it will only do it if we put 01:01 o 00:59 It is a common fault in these heaters, I haven't been able to test it on this specific one., but it probably happens with this one too.
Set the time
No matter how many combinations I tried, I couldn't find a way to set the time.. Surely it could, you who are reading this manual, if you figure out how to do it, I encourage you to send me an email and tell me how to do it. admin@ycomosehace.es
The only way I can think of to set the correct time, would be to remove and replace the fuse exactly at 00:00 of the night, but simply the clock will mark the hours that the heating has been connected to 12v.